

Binfire Help
Table of content
Index page
• Join for free
• Log in
• Share files
• Search for members
• Search for groups
• Recover forgotten password
Dashboard
• Your Online Contacts
• Recent Invitations
• Recent Invitations
• Recent Messages
Cloud Folder
• Up
• Upload File
• New Folder
• Cut
• Copy
• Paste
• Delete
• Download
• Update Info
• Share
• Lock / Unlock
• File Manager
Collaborate
• Create a new group
• Join an existing group
• Manage groups you own
• View Groups you are a member
Contacts
• Internal Contacts
• External Contacts
Messages
• Inbox
• Outbox
• Shares
• Compose
Share (Files)
• Share files
• View / Play files
• File versions
• File Properties
• Hotlink
Download
Home
• The Title section
• The Info section
• The Photo-Video-Audio section
• The Popular Tags section
• Guest Book section
• Upcoming Events section
1. Index page
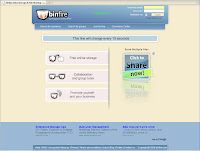
In the index page, a user can do the following:
• Join for free
• Log in
• Share files without logging in
• Search for Binfire members
• Search for Binfire groups
• Recover forgotten password
1.1 Join for free (Register)
Select the Join for Free option on the top menu for registering with binfire.com. A registration page opens.
Type your first name, last name, a valid email and password you want for your account. You need a valid working email address. You will get a confirmation email from webmaster@binfire.com. You need to use the link in this email to activate your account. The reason we require a valid email is that to use collaboration function in binfire.com you need a working email. After confirming your account, use your email and password to log in.
1.2 Log in
Use your email and password to log in. If you forget your password, you can always retrieve it.
1.3 Send Multiple Files
You can upload and send multiple files to family and friends. No login is required! Each file could be as big as 100MB!
Click the Share Now icon on the right of Index page. A new page is opened. In this page, select files you want to share by pressing browse button. You can select additional files by pressing browse again. Enter your email, your friend email(s) and a message you want to send along with the files you are sending and click Send file. An email will be sent to your friend’s and your email box containing a URL where he can view or download the files you have sent to her / him.
1.4 Search for Binfire members
You can search for Binfire.com registered members. The latest 10 members are display automatically in order they register. Click the Search for Members in the top menu. Type in a name, an email or any text to search a member
1.5 Search for Binfire groups
You can search for groups which are public. Click the Search for Groups in the top menu Type in a name, a subject or any text to search for a group
1.6 Recover forgotten password
If you have forgotten your password you can recover it by clicking on the “Forgot Password?” option. In the Password Recovery page, enter your email address that you used to register and click Send Password. An email with your password will be sent to your email address
Logging into your account:
After logging into your account, the first page you see is your dashboard. Notice the tabs on the top of the page. These are the navigational tabs which let you move around and perform different tasks. Each tab opens a new page and sub pages. All pages have ‘Bread Crumb’ path on the upper left corner which shows current path.
2. Dashboard
Dashboard displays the latest events in your account. This includes recent messages, new invitations, status of your invitations, online contacts. You can chat with your online contacts by clicking on their pictures or names.
The dashboard has three sections:
• Your Online Contacts
• Recent Invitations
• Recent Messages
2.1 Online Contacts & Chat – This section lists your contacts that are currently online. For each contact his / her picture and the current status (active or not) are shown. You can chat with your contacts by clicking on the picture or on the name of any one of your contacts. Please make sure your browser popup blocker is turned off. When you click on a contact’s picture a chat box is opened. You can communicate with your contact similar to any IM in use today, including saving your conversation after chat.
Note: To have contacts you have to invite your friends who are also binfire.com members to become your contact. See Contacts section for more details.
2.2 Recent Invitations – This section lists invitations you received since the last time you logged in. Invitations are requests for contacts or group membership. You can accept or deny an invitation.
The following types of invitation may be listed in this section:
• A user invites you to be his / her contact (friend, business associate, family etc.)
• A user invites you to become a member of a group he owns.
• All invitation you have sent and its status
2.3 Recent Messages – This section lists recent text messages and shared files messages you have received. If you click on a message, it will take you to the Inbox in the Messages page, where you can read the message and reply. If you click on a shared files message, it will open a popup window that shows a list of shared files. In this popup window, you can view image files, play video or audio files, download any of the shared files or copy any of the shared files into your web folder or group folders.
Even though the recent messages list is only shown once when you login, you can see them in the messages tab.
2-Cloud Folder
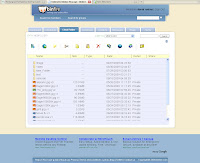
In this tab you can access all your cloud folders. In addition to your web folder, you might have access to several other folders. These include group folder you created (check collaboration section for detail), or folder of groups you joined. It also shows the shared folder of all your contacts. From the drop down box on the top right choose the folder you want. Your web folder is the default folder (this is your storage vault in the cloud). You can select your group folders (the one you own or the ones you are a member) or shared folders of your contacts. You have full permission access to your web folder and the group folder you own. You might have read / write or read only access to group folders which you are a member of. This is up to group owner which permission level you get. You have only read access to your contacts shared folders. Remember that your contacts shared folders might be empty, because they have not shared any file with you.
At top left the ‘Bread Crumb’ shows the current path. You may click on any level to navigate.
The cloud folder includes the following controls:
Up one level-Navigational tool to go up one level
Upload files- Upload multiple files from your PC to your cloud folder
New Directory- Create a new Directory
Cut- Cut a File. Select a file by clicking on its name once and then press Cut.
Copy- Copy a File. Select a file by clicking on its name once and press Copy.
Paste- Paste a copied file. Select e file by clicking on its name once
Delete- Delete a file (select the file by clicking on its name once)
Download- Download a file (select the file by clicking on its name once)
Update info on file- You can change the file name, its keywords and comments fields as show below. To get file info, select a file by clicking once on its name and press Update Info.
Share- You can share a file with family, friends, business colleagues or any combination of them (like friend & Family or all contacts) or public as shown below. By default all files are set to private when first uploaded. Remember when adding contacts you can tag them as friend, family or Business. Refer to contact tab page in this document for more information.
Select a file by clicking on its name once and then press share. In binfire.com, there exist several methods for sharing. In the method here, you can share a file with all people you have tagged as friend, or family, or business or everybody (public). This is an easy way to share a file with all your friends. Your friends can look into your shared folder and downloading files you have shared. In case you want to share a file with only one or a few friends then use the share tab described later. There you can specify whom you want to get your files. Please make sure not to flag files that you don’t want others to see or share copy protected files as public!
Lock / unlock File- This control is only available while in group folder and only if you have permission to modify files in that group folder. Select a file by clicking on its name once, and press lock/ unlock. Only the user who has locked the file can unlock it. This feature is important when two or more people are collaborating on files.
File Manager- File manager is a java applet that provides functionality for managing files beyond what is possible in web applications. Currently there are four controls in the file manager as listed below:
• My Computer-The file manager for all files on the computer you are using.
• Web Folder- Your cloud storage Folder and sub folders. You have full control over this folder.
• Groups’ Folders- Your group folder and folders of groups which you are a member. Depending on your permission level you might have read only or read / write privilege. You always have full control over your own group folder.
• Shared Folders- The shared files by your friends, family and business colleagues. These folders are read only and you may not copy files to them.
In the file manager you can copy and paste or drag & drop files and folders from any folder to the other folder as long as you have permission to write to the destination folder.
In the file manager you can’t not lock files or delete locked files (even files you have locked yourself). These tasks could only be performed in the Cloud Folder or Share tabs.
3-Collaborate
In this tab you can manage your collaboration efforts. Remember that each collaboration team (group) gets it own storage folder. This folder is accessible to all group members. The group owner has complete control over who could be a member of a group, permission levels etc. In the collaboration tab you can do the following:
• Create a new group
• Join an existing group
• Manage groups you own
• View Groups you are a member
3.1 Create a new group
Each free binfire.com member can create and own one group. To have more groups and manage all of them in one dashboard is a paid service which will be introduced in future. Each group has its own unique storage folder. In this tab you can name your group, select private or public. If you select private other binfire.com members don’t see your group and can’t ask to join. If you choose public, all members can see your group and can ask to join. It is up to you to allow anybody to join or not. As a rule of thumb if you create a work group for collaboration is should be private. If you create a hubby group (for example photography group) it should be public. You should also write a brief mission statement for the group.
3.2 Manage your group
In this tab, you can manage the group(s) you own. Remember as the group owner you are the only one who access to this tab. To invite members press invite in this page.
You can invite both binfire.com members and people you know who are not a member of binfire.com (world).
3.2.1 Invite Binfire.com members
Search for people you want to invite by name or email. The name of all those who match the search parameters will be shown in the box below. In the picture below I have searched for the name Dan. You can select the names you want to add to your group. The name is added to the second box below. You can search for multiple names. The content of the second box will not be cleared. This way you can search for Dan and then for Joe and others and add them to the list. You can decide to give read / write or read only permission to each member you have added. When you have added all names, send invitations to them. After they accept the invitation, their name will be shown in your group dashboard.
3.2.2 Invite the World
To invite group members who are not yet a member of binfire.com, select world radio button. As shown below you can type the email for friends you want to invite. You can also use your address book if you have already imported them from your outside email accounts. After adding your friends to the list, give them the permissions levels you want and write them a message describing your group and what would be their tasks. When done press send invitation button. Your friends will get an email which includes your message and a link to confirm register at binfire.com (they need to select their own user name and password). When they confirm, they are given their own account and automatically added to your group!
3.3 Manage group setting
If you press manage, a new tab opens which gives you the tool to change your group’s description, members’ permission settings and remove members from your group.
3.4 Delete Group
You can also delete a group. You get a warning asking if you really want to delete your group. All members are notified. Before disbanding a group, make sure to give ample warning to the group members. Remember that in the messaging tab you can send messages to group members by selecting the group as the recipient of the email.
4-Contacts
The Contacts page you can manage both your internal and external contacts. Internal contacts are your friends, family members or business associate that are also a member of binfire.com. It is much easier and faster to share files with internal contacts. You can also chat with internal contacts that are online and logged in to binfire.com. External Contacts are anybody whom you have saved his or her name and email address. You can send files to your external contacts by using Share tab.
4.1 Internal Contacts
Internal contacts are Binfire registered users who requested to be your contacts and you accepted them, or users whom you requested to be your contacts and they accepted. When adding a contact, you can tag them as friend, family or biz. This information is very important. You can share one or more files with your friends or family or business colleagues.
The Internal Contacts tab displays the list of current internal contacts with controls to add or delete contacts.
Delete Contacts – Select contacts to be deleted by checking the check signs and then click the Delete button.
To add contacts, click the Add Contacts to display a search form. Type a name, an email or any text to search for friends and click Search Contacts. As a result all contacts that match the search parameters will be displayed in a box on the left.
Select the contacts you wish to add and click the Add button to add them to the box on the right. To remove contacts from the box, check them out and click Remove. Type your message in the Invitation Message box and click Send Request.
As a result, the system will send an invitation to the selected users. After these users accept your invitation, they will be added to your internal contacts.
4.2 External Contacts
External contacts are your contacts who are not Binfire.com registered users.
In this page you can add a new contact, import contacts from you email account (Currently Yahoo, Gmail and Hotmail are supported- We plan to support more email systems in the future). You can also delete a contact or change his or her information.
5-Messages
Binfire.com has a simple yet powerful messaging system. You can send Internal and External email using binfire.com email system. In future we plan to give you the possibility accessing your external email (yahoo, Gmail etc.) in binfire.com messaging page. There are three standard tabs in this page. Inbox, outbox and compose. Notice messages coming from your groups are identified as group messages.
5.1 Inbox
The Inbox tab lists the incoming messages. You may read a message by clicking on it and reply. You may delete messages from the Inbox by selecting them and clicking the Delete button. When you reply to a message you may add other recipients in the “To” field by clicking the address book icon and selecting internal or external contacts or groups.
5.2 Outbox
The Outbox tab lists the messages that you have sent out. You may delete messages from the Outbox by selecting them and clicking the Delete button.
5.3 Compose
Go to this tab to compose a new message to be sent out. Click the address book icon to select internal or external contacts or groups to send the message to. You may search for contact in the address book using either the All Contacts tab or the Internal Contact tab, the External Contacts tab or the groups tab. Type in a subject, the message body and click Send.
5.4 Shared Files
The Shares tab lists the messages which have an internal shared file attached to them. Click on a message to open. A popup window opens which shows the shared files. In this popup window, you can view image files, play video or audio files, download files or copy files to your web folder.
6-Share Tab
In this tab, you can share files with internal contacts, external contacts or anybody else by using their email address, get a hotlink for a file, download previous version of a file and view or play images, audio and video (Flash) files. The application only plays flash video files. To convert a video file to flash, use the File Manager for upload any video file. The File Manager gives you the option to convert video files to flash during upload. Tasks you can perform in this tab are listed below:
• Share files
• View / Play files
• File versions
• File Properties
• Hotlink
6.1 Share Files
To share a file, select it and click “Add to basket” button. You can add multiple files to the basket. When done, press “share” button. In a new page you can enter the email of people whom you want to send the files as shown below. Notice you can use the address book to access your internal and external contacts.
6.2 View / Play Files
You can view jpeg files and play audio and video (flash only) files. Select a file and press play / view.
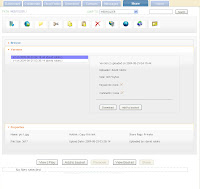
6.3 File Versions
You can see all versions of a given file and download any version you choose. Select a file and then press version link in the middle of the page. As the image below shows, you can select a version and add it to the basket or download it.
6.4 Properties
In the properties section of the share tab, all relevant information for a file is shown. This includes file size, last person who updated the file (important for group folder), the status of the file if it is private or shared, and hotlink.
6.5 Hotlink
In the properties section there is a link called Hotlinks. If you select a file and press copy, a new page as shown below is opened. You can copy the URL for this page and send it you friends. This is one of several ways of file sharing in binfire.com.
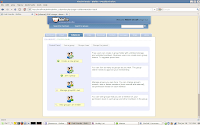
7-Downloads
This tab which is also available in the Index page lets you see and download files shared by members of binfire.com community. The files are filtered into several segments like images, Audio etc. Select a category you like and press browse. All files of the type you have selected will be displayed. You can search for specific files by name or attribute here. Please remember sharing copy protected files is prohibited by law and all files deemed illegal will be deleted.
8.0 Home
The home page may be used to present yourself or your business to the outside world. You may post text, pictures, audio and video on the home page for your friends, family, business partners and others to view.
The home page can be viewed by you as an owner or by others as guests. When viewed as an owner, you have all the controls to update the page. When viewed by a guest, the guest does not have a permission to update the page except of certain fields that the owner allows him to do so.
8.1 The Title section
The Title section contains a name and a short description. The name could be an individual or a business name. The description could be some info about the individual or the business. When in owner mode, click Edit to create or modify the name and description.
8.2 The Info section
The Info section contains an image or a logo that the owner chooses to post there, the name (from the Title section), a link to view the About Us and a link for Contact US.
When in owner mode, click Change Image to post a new image, click About Us to modify the content and click Contact Us to modify the content.
8.3 The Multi-media section
In this section the owner can post up to 10 images, one video and one audio file. In the future additional files may be posted for a fee. We plan to make this section a true library for pictures, audio and video files in future.
When in owner mode, click Edit to post files. The list of posted files is displayed on left while on the right additional files can be posted. You may remove files by selecting them and clicking Delete. Also on the right you may see the status of the number of files you can post at any point of time.
When you are done with posting files, click Finish to go back to view mode.
8.4 The Popular Tags section
In this section the owner can post tags that are linked to desired pages. Click Edit to add or modify the popular tags.
8.5 Guest Book section
In this section guests can post messages, feedback, opinion or any other text.
Upcoming Events section – In this section the owner can post messages about upcoming events for all guests. When in owner mode, click Add to add an event.